1). Download the phpMyAdmin installer package. Get the .zip from the quick downloads section.
Click here to Download...
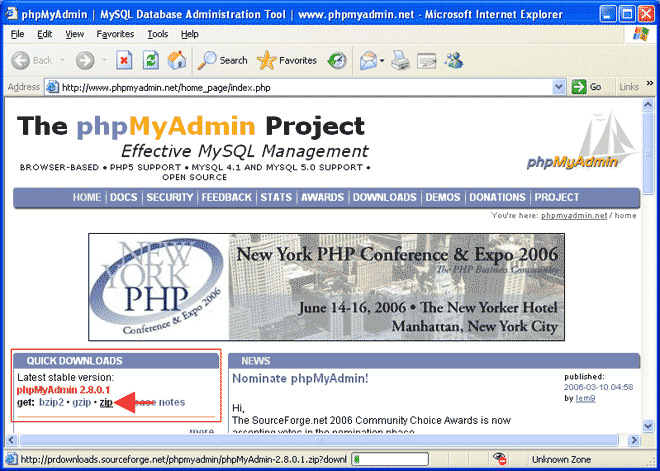
2). Create a folder in your HOME directory called "phpmyadmin". This has to be web accessable, so it has to go in your home directory. e.g.. C:\HOME\PHPMYADMIN
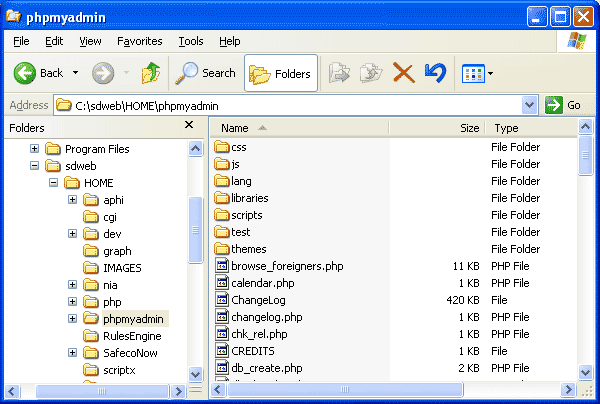
3). Open the zip file you just downloaded. The first folder you see will contain the files to copy to the directory you just created. Do not copy the root level folder. Do copy the contents of the root level folder. Copy the files over so the structure will look like the following (or similar, depending on where your HOME directory is)....
CORRECT
C:\ SDWEB\HOME\PHPMYADMIN\(FILES)
INCORRECT
C:\SDWEB\HOME\PHPMYADMIN\PHPMYADMIN-2.8.0.1\(FILES)
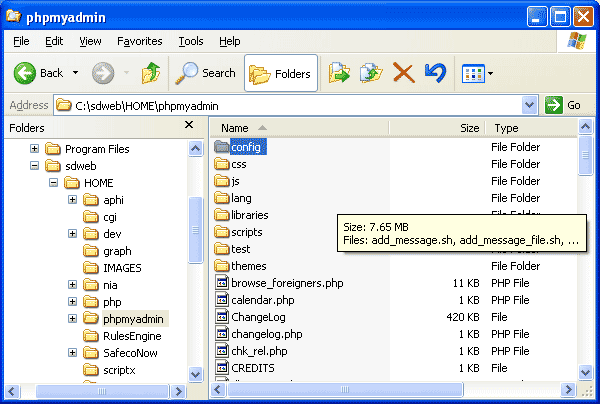
4).Now, create a folder inside PHPMYADMIN and name it CONFIG
C:\SDWEB\HOME\PHPMYADMIN\CONFIG
5). Make sure the the 5g engine is running and launch a browser. GO to the following url
http://localhost/phpmyadmin/scripts/setup.php
If you get a warning on the page that says you need to create a config folder as in step 4, ignore it and REFRESH the page, the warning will disapear.
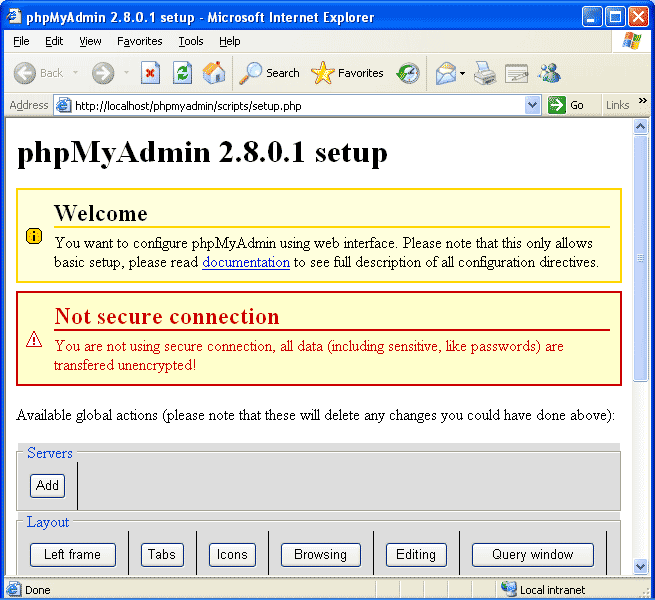
6).You will now be at a page called phpMyAdmin (ver #) setup. DO the following...
a). Click on ADD under the SERVERS section. Look for the line Password for config auth
- Add the password that you created when you installed MySQL from the Installing MySQL on Windows tutorial.
- Leave everything else at it's default and click ADD.
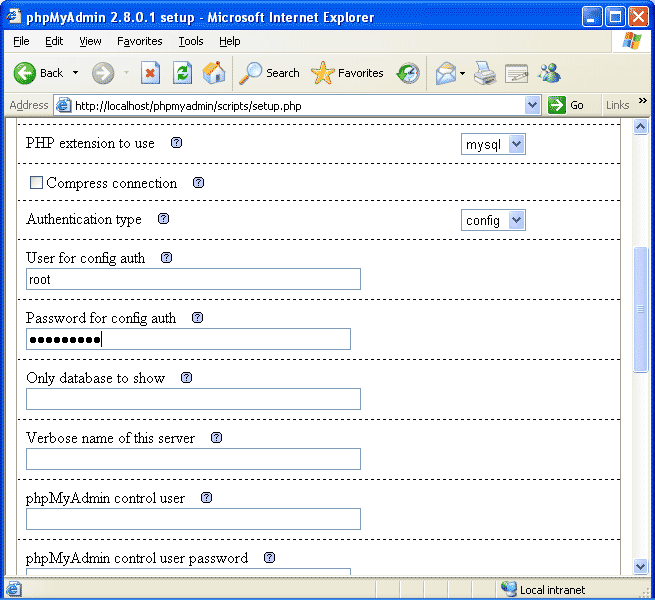
7).Click on DISPLAY under the CONFIGURATION section.
a). Make sure your password has been added to the line..
$cfg['Servers'][$i]['password'] =
b). Scroll down and click SAVE under the CONFIGURATION section.
c). Close your browser
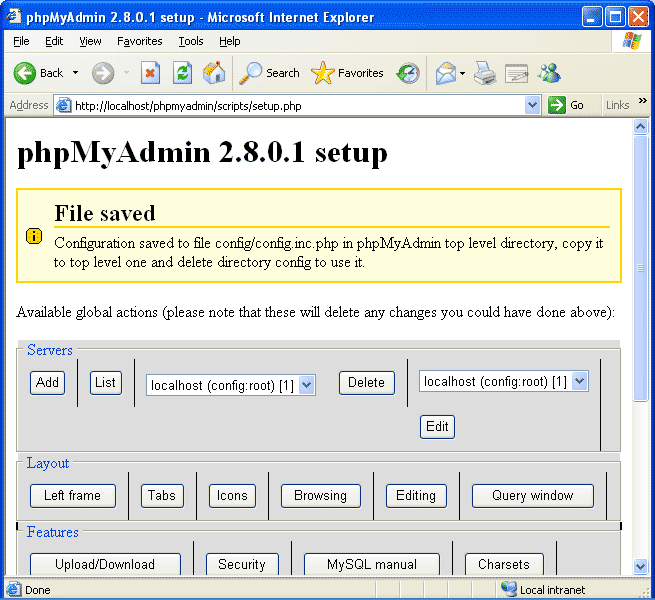
8).GO to the folder...
C:\ SDWEB\HOME\PHPMYADMIN\CONFIG
Drag the file config.inc.php from the CONFIG folder to the root level, phpMyAdmin folder. So, it will look as follows
C:\ SDWEB\HOME\PHPMYADMIN\CONFIG.INC.PHP
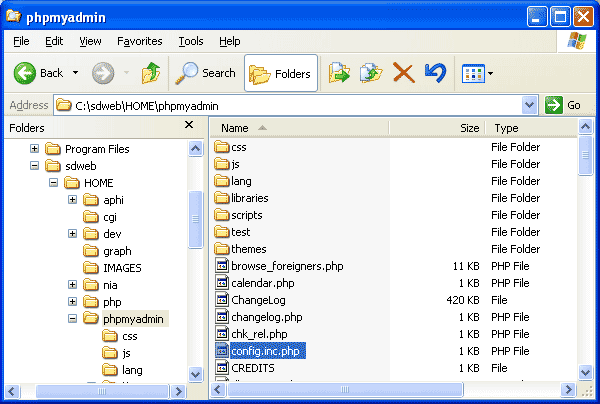
9). DELETE the empty folder CONFIG that you created earlier ( ! VERY IMPORTANT ! )
Congrats, you now have installed and configured the PHP based front end for MySQL management.
Lets take a look at it.
1).MAKE SURE YOU HAVE AN INSTANCE OF MYSQL SERVER RUNNING. To make sure, Do the following...
- Right Click on My Computer on your desktop. Choose MANAGE.
- Click the + next to Services and Applications.
- Click on services
- Scroll down to find MYSQL in the Services List.
- Check it's STATUS. It should be STARTED.
- If it is NOT STARTED ( blank), right click on MySQL and choose START.
- It should now indicate that the service has STARTED.
- Close your Computer Management Screen.
2) Open a browser and launch the following url..
http://localhost/phpmyadmin/index.php
With any reasonable luck you should see an administration screen.
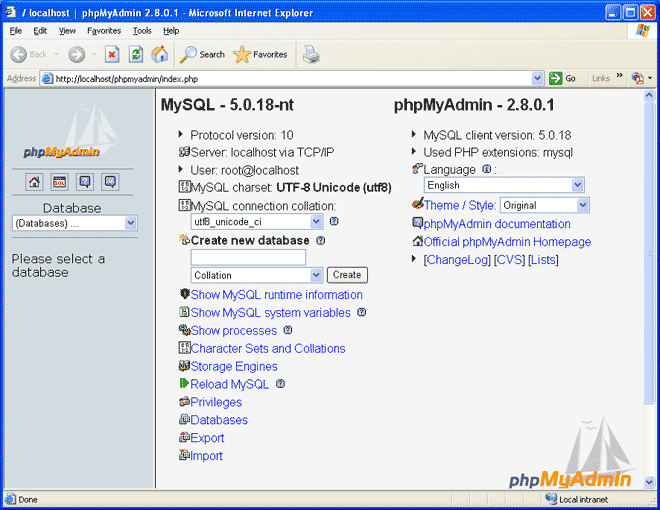
3).On the left hand side, Use the Drop Down to select a Database.
There you have it! You are now using PHP and MySQL under the 5g Engine.
Documentation on this page contributed by Frank Aiello.
#####