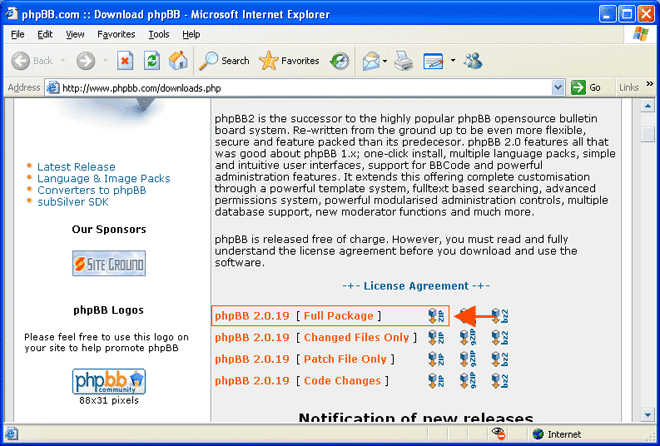
1). Download the phpBB package. Get the .zip from the downloads section.
Click here to Download...
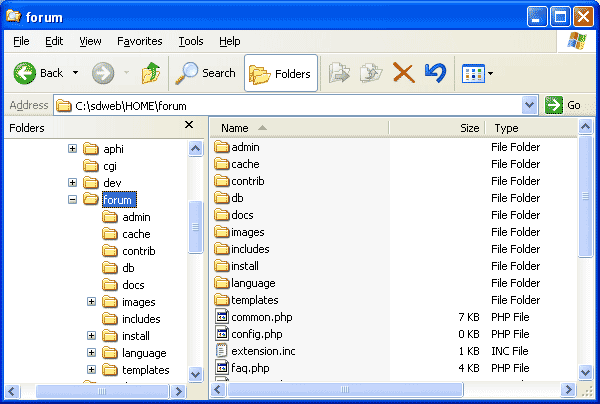
2). Create a folder in your HOME directory called "forum". This has to be web accessible, so it has to go in your home directory. e.g.. C:\HOME\forum
3).Copy all of the files from your downloaded zip to forum folder
C:\HOME\forum\(files)
4).Make certain that you have the FifthGen Engine and the MySQL Server running.
5). Point your browser to...
http://localhost/forum/install/install.php
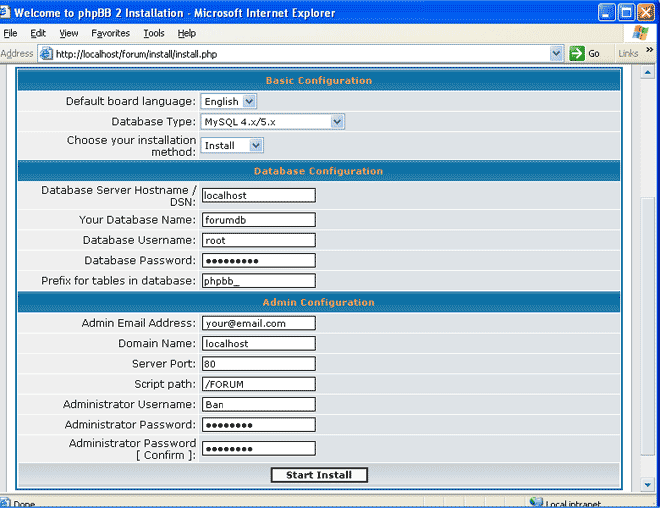
BASIC CONFIGURATION
6).Set the parameters to the following...
- Default board language: = English
- Database Type: MySQL 4.x/5.x
- Choose your installation method: Install
DATABASE CONFIGURATION
7).Set the parameters to the following...
- Database Server Hostname / DSN: localhost
- Your Database Name: forumdb *( see 7a - explanation below )
- Database Username: root
- Database Password: whatever password you used when you installed MySQL
- Prefix for tables in database: phpbb_
7a). Under Database configuration/Your DataBase name, you need to specify which database to use. You specified forumdb, but it really doesn't exist yet. BEFORE you can complete the installation of phpBB, you MUST create it. Now we will come to understand the importance of the tutorial Installing phpMyAdmin on Windows.
Do, in a new browser window, go to:
http://localhost/phpmyadmin/index.php
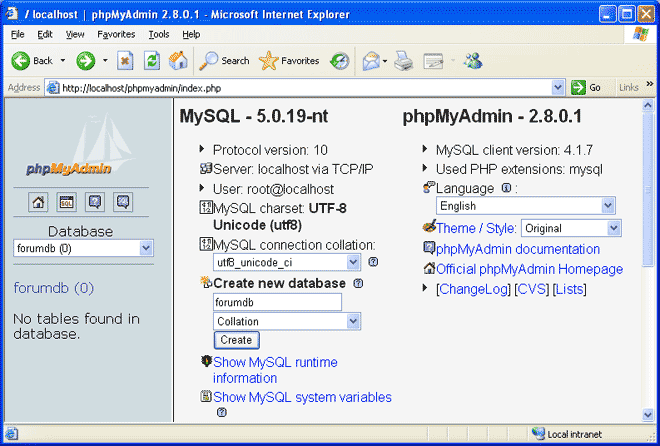
7b). Look for Create New DataBase and enter forumdb , leave the dropdown as Collation and hit Create. Whoo Hoo! You have just created a MySQL DataBase for the new forum to use.
Close the phpMyAdmin Browser and return to the phpBB configuration screen.
ADMIN CONFIGURATION
8).Set the parameters to the following...
- Admin Email Address: Your e-mail address
- Domain Name: localhost
- Server Port: 80
- Script path: /FORUM ---- *NOTE, this is NOT the default and will not work if not specified as indicated
- Administrator Username: Whatever you want the Administrator Username to be
- Administrator Password: Whatever you want the Administrator Password to be
- Administrator Password [ Confirm ]: Confirm you Administrator Password.
9).Click Start Install
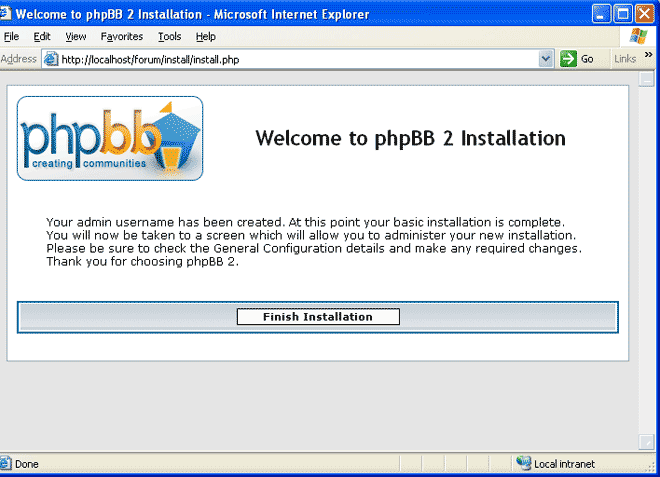
10).When finished, you are presented with the confirmation screen that tells you your username and password has been created. You're almost done. Click Finish Installation.
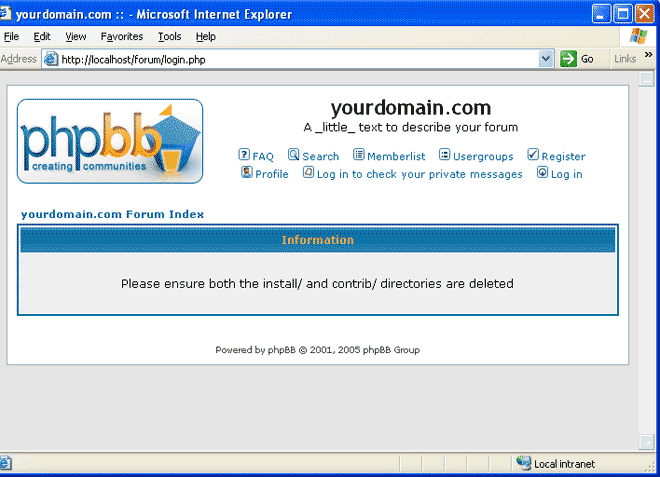
11). You are instructed to "Please ensure both the install/ and contrib/ directories are deleted". This is a VERY IMPORTANT STEP. Otherwise, you are leaving a serious potential security issue which may lead to deletion or alteration of files.If you don't do it, you cannot proceed with configuring and administering your forum. This is for security purposes. DELETE THEM NOW.
12). Go back to the folder C:\SDWEB\HOME\FORUM and change the permissions of the file CONFIG.PHP to 644 or it's equivalent. If you don't, anyone can go there and make changes. Again, security purposes
If you need to re-install for any reason. You must...
a). Delete the Database ( Use the DROP function in phpMyAdmin to do this)
b). Start this tutorial over again
Well Done! You have succesfully installed phpBB on your 5th Gen served web site. Now, you can login as Admin to start configuring your board. Typically, the login URL will be something like...
http://localhost/forum/login.php
Just for kicks, you can go back to..
http://localhost/phpmyadmin/index.php
Notice the forumdb you created now has 30 entries. You now have PHP, MySql and the FifthGen Engine working together.
Documentation on this page contributed by Frank Aiello.
#####